Quickstart
1. Installation via abapGit
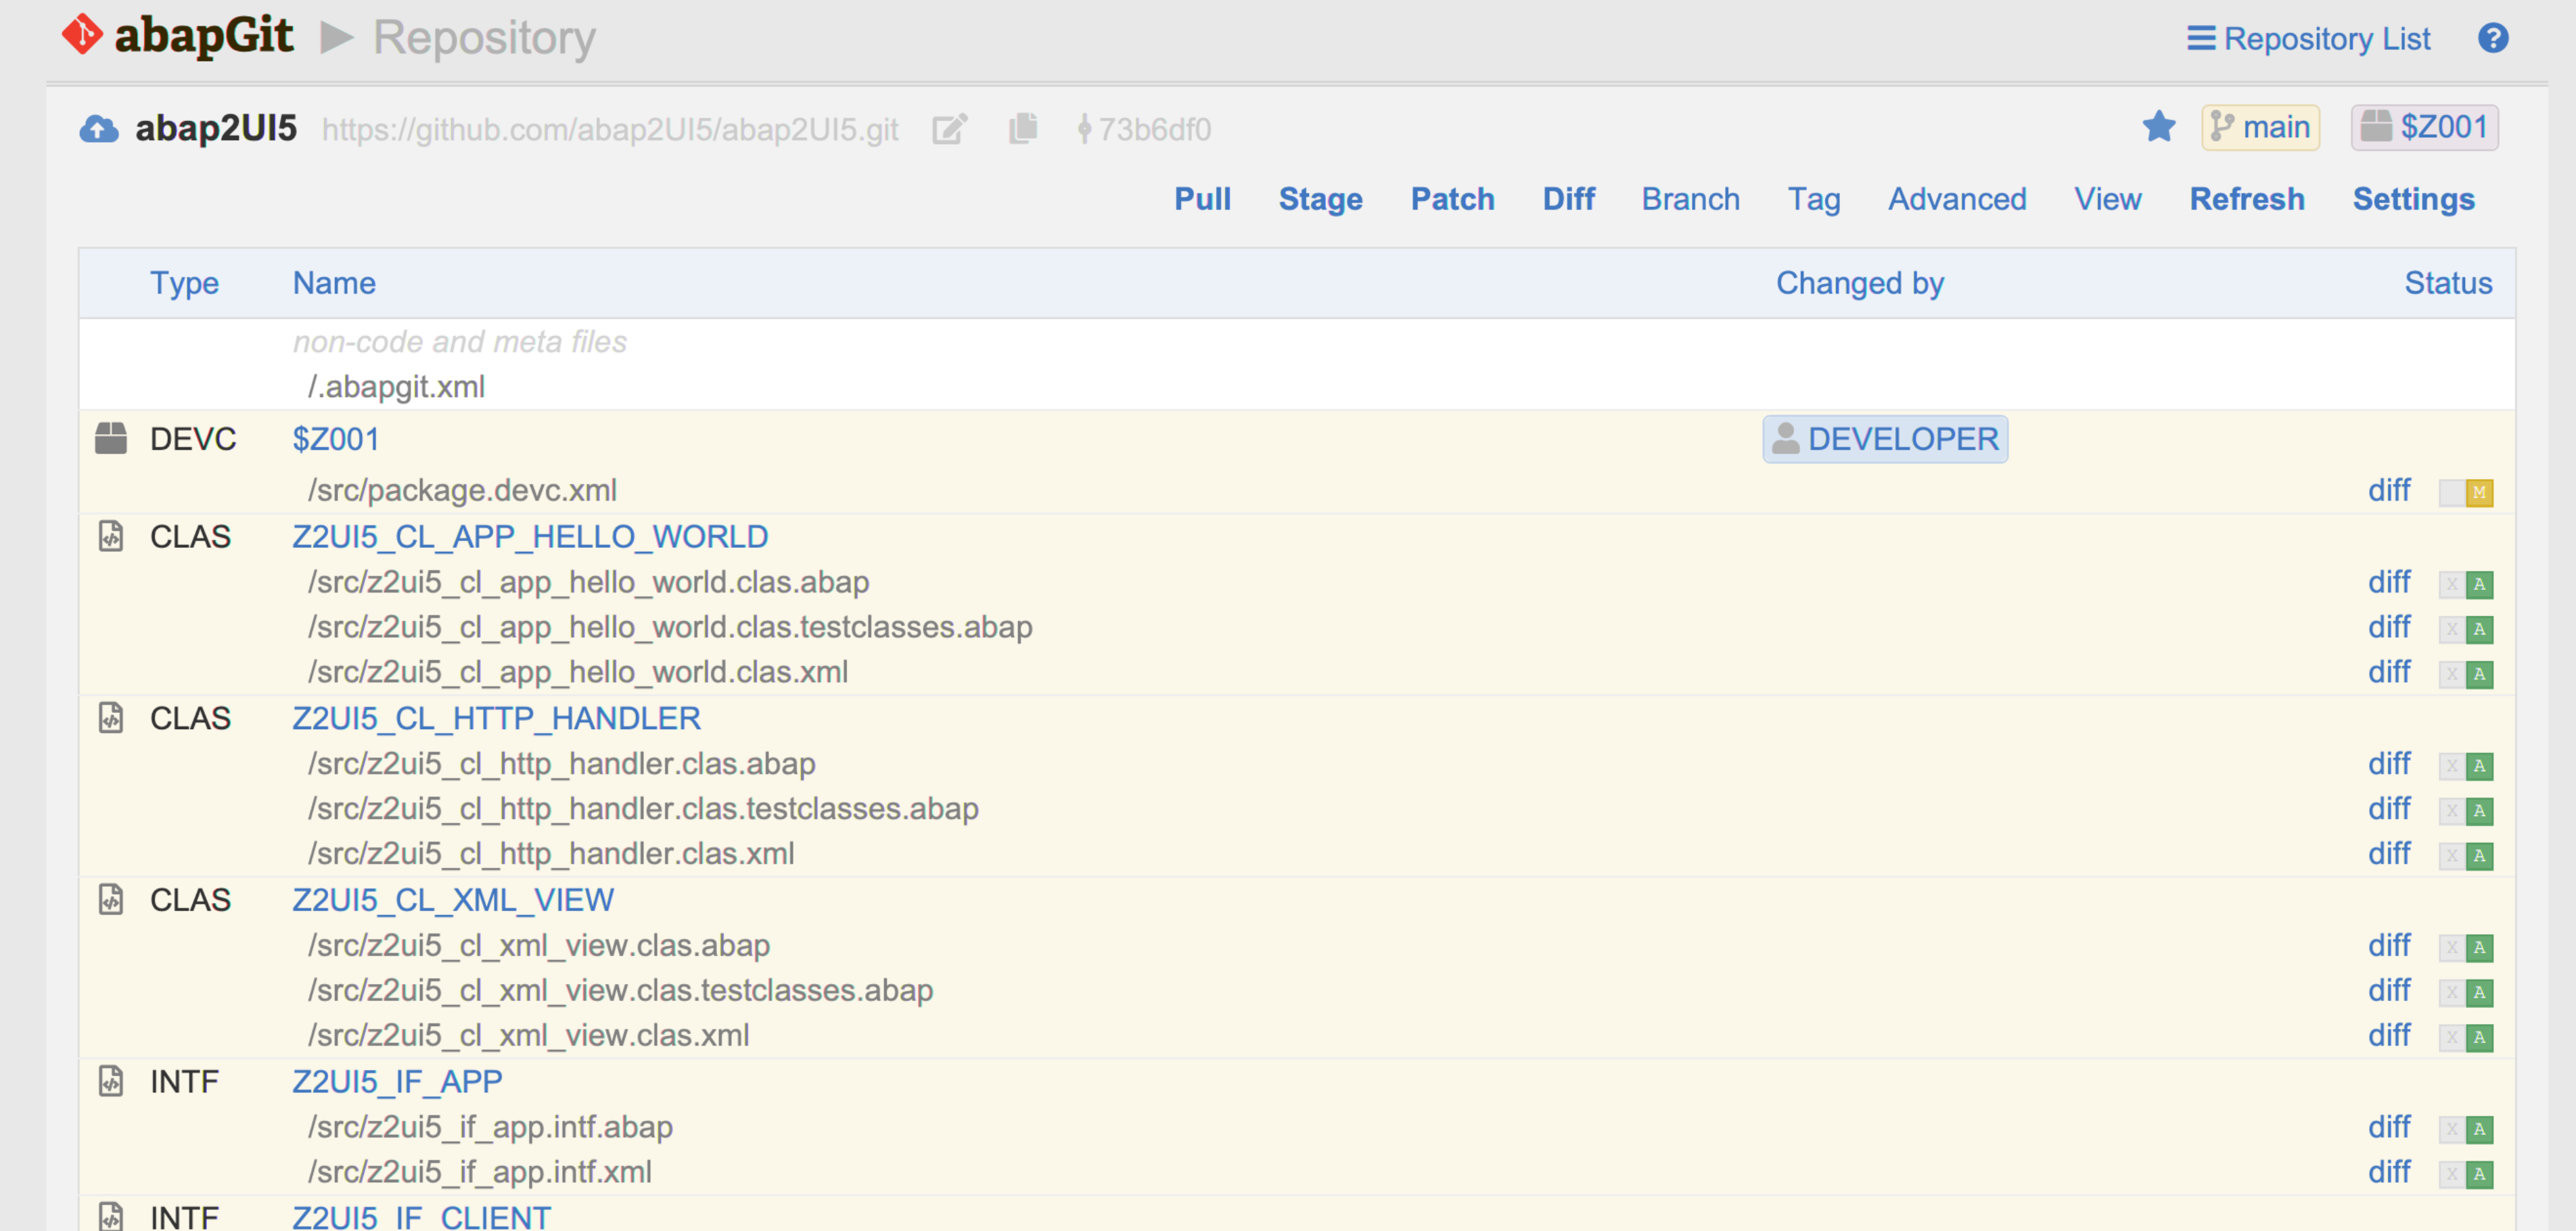
Install abap2UI5 with abapGit. (New to abapGit? Install it first — see abapGit; it's the one-time tool used to pull abap2UI5 into your system.)
ABAP Cloud
2. Set Up HTTP Handler and Service
Create a package and define an HTTP handler class. Use the ABAP tab for Standard ABAP systems (R/3 NetWeaver, S/4 On-Premise / Private Cloud); use the ABAP Cloud tab only on BTP ABAP Environment or S/4 Public Cloud:
CLASS zcl_my_abap2UI5_http_handler DEFINITION PUBLIC.
  PUBLIC SECTION.
    INTERFACES if_http_extension.
ENDCLASS.

CLASS zcl_my_abap2UI5_http_handler IMPLEMENTATION.
  METHOD if_http_extension~handle_request.
    z2ui5_cl_http_handler=>run( server ).
  ENDMETHOD.
ENDCLASS.CLASS zcl_my_abap2UI5_http_handler DEFINITION PUBLIC.
PUBLIC SECTION.
INTERFACES if_http_service_extension.
ENDCLASS.
CLASS zcl_my_abap2UI5_http_handler IMPLEMENTATION.
METHOD if_http_service_extension~handle_request.
z2ui5_cl_http_handler=>run( req = request res = response ).
ENDMETHOD.
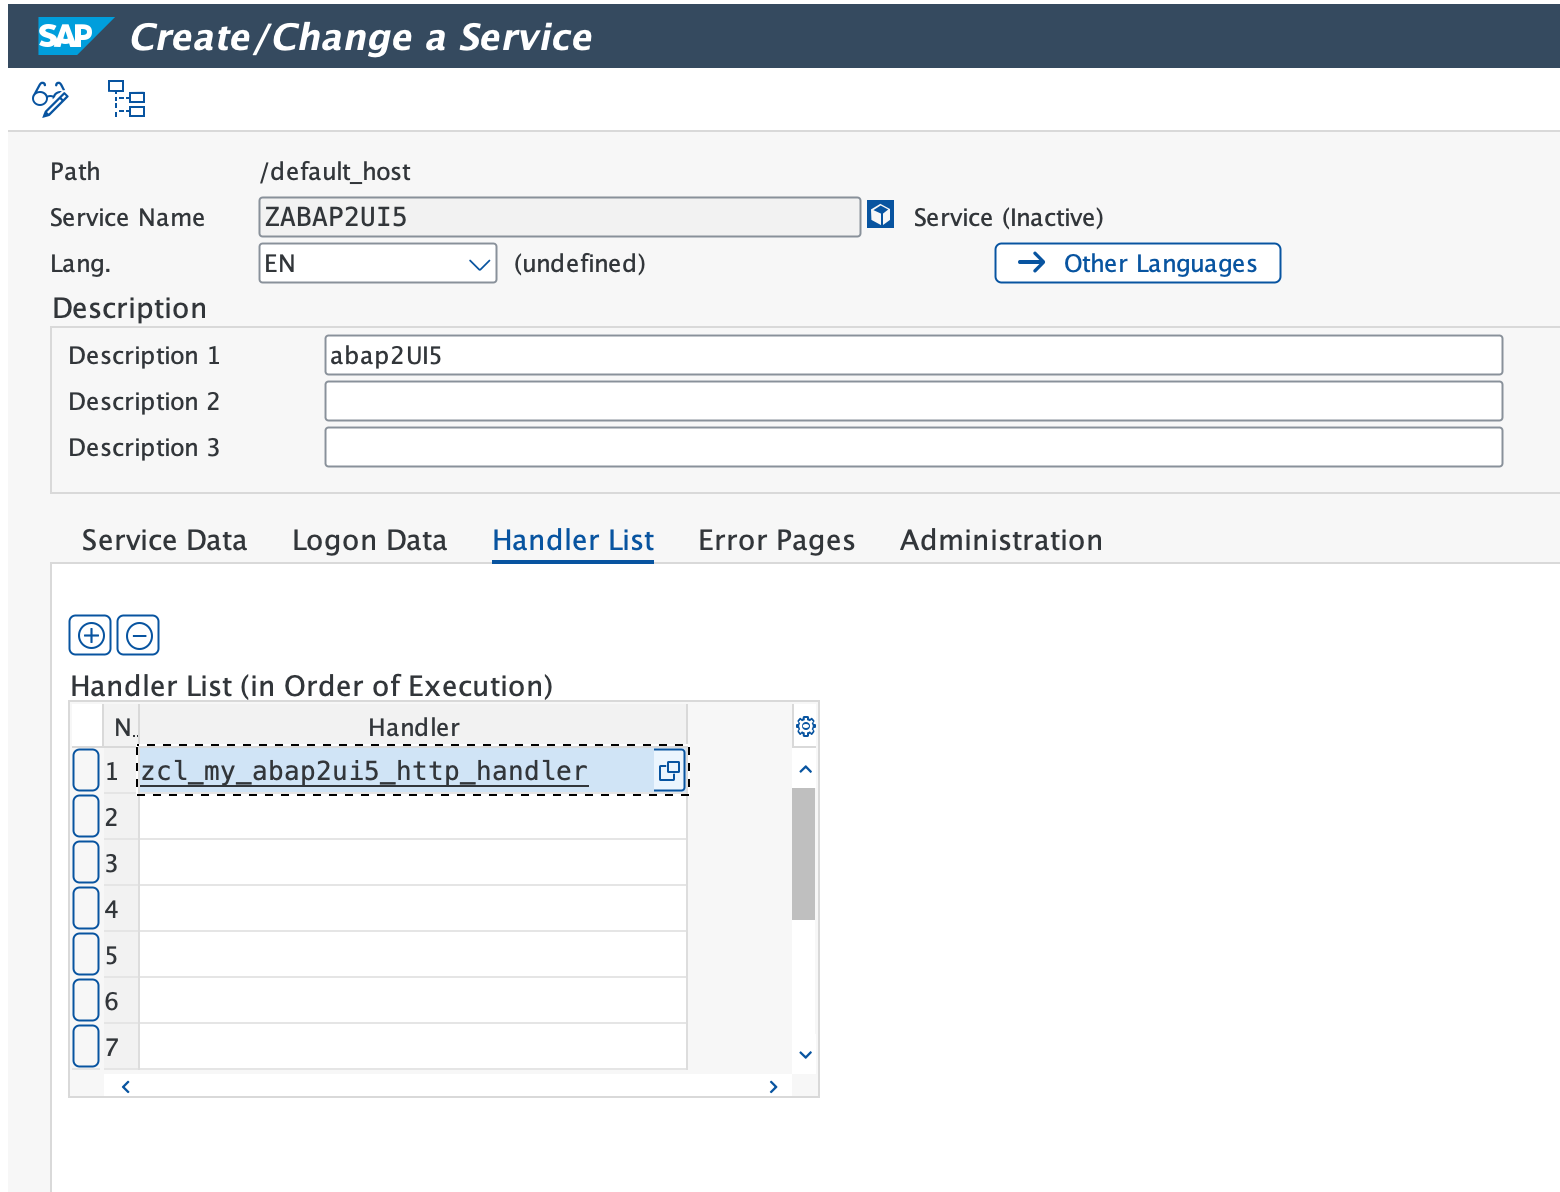
ENDCLASS.Next, use transaction SICF to create an HTTP service and enter your handler class in the service's Handler List tab, then activate the node:
Security
abap2UI5 talks only to the HTTP service you define, giving you full control over accessibility, authentication, and other security aspects.
3. First Launch
Open the HTTP endpoint in your browser — in SICF, right-click your service node and choose Test Service (the URL looks like https://<host>:<port>/sap/bc/<your_service>). This startup page is also where you will launch your own apps later: Press
check to verify your installation, then launch the bundled test app to confirm everything works. That's it — you can now build your own abap2UI5 apps.
4. Your First App
Build a class on your system:
CLASS zcl_my_app DEFINITION PUBLIC.
  PUBLIC SECTION.
    INTERFACES z2ui5_if_app.
ENDCLASS.

CLASS zcl_my_app IMPLEMENTATION.
  METHOD z2ui5_if_app~main.
    client->message_box_display( `Hello World` ).
  ENDMETHOD.
ENDCLASS.
Back on the startup page, enter your class name ZCL_MY_APP in the input field and launch it — that's it: you've built your first abap2UI5 app.
Naming
Name your own apps in your customer namespace (Z.../Y...). The Z2UI5_ prefix is reserved for the framework and its samples.